It’s common within large environments to encounter defined host names that are unintuitive or even confusing. Your organization’s Ops team may want to name hosts based on each hosts’ physical location or configuration. Meanwhile, your developers may prefer that hosts be named based on the services they host. And your organization’s application developers may want to name hosts based on the application tiers or environments they represent.
Dynatrace automatically detects and monitors the infrastructure on which it’s deployed, including all detected hosts. The real power of Dynatrace, however, comes from zero configuration and automatic correlation of events. To achieve this, Dynatrace not only detects hosts, but it also detects the technologies, locations, services, applications, and dependencies between these entities.
Custom host naming
Maintaining consistent, intuitive host naming in such environments can be a challenge—often leading to undesired conflicts and challenges. This is why, for some time now, Dynatrace has provided basic host-naming rules that override FQN names and meet the expectations of your DevOps team. The customization features available prior to this release included custom host naming via configuration file on the host (hostname.conf), as well as manual hostname reconfiguration within the Dynatrace UI. Nonetheless, it became apparent that, in some cases, basic host-naming rules aren’t enough to satisfy all host naming demands, especially within large, dynamic environments.
It’s therefore with great pleasure that we announce a huge improvement in how automated naming of hosts can now be customized within Dynatrace. The new solution is available with OneAgent version 1.151 and Dynatrace Server version 1.152.
New, and yet so familiar…
The powerful new naming customization mechanism is based on the existing solution we built into Dynatrace several months ago. This mechanism is already used for custom naming of process groups. You can read more about custom process group naming in an earlier announcement blog post. We hope that by using this well known and widely adopted mechanism, we can shorten your learning curve and simplify the process of automated custom host naming.
Configure host-naming rules
To add a new host naming rule
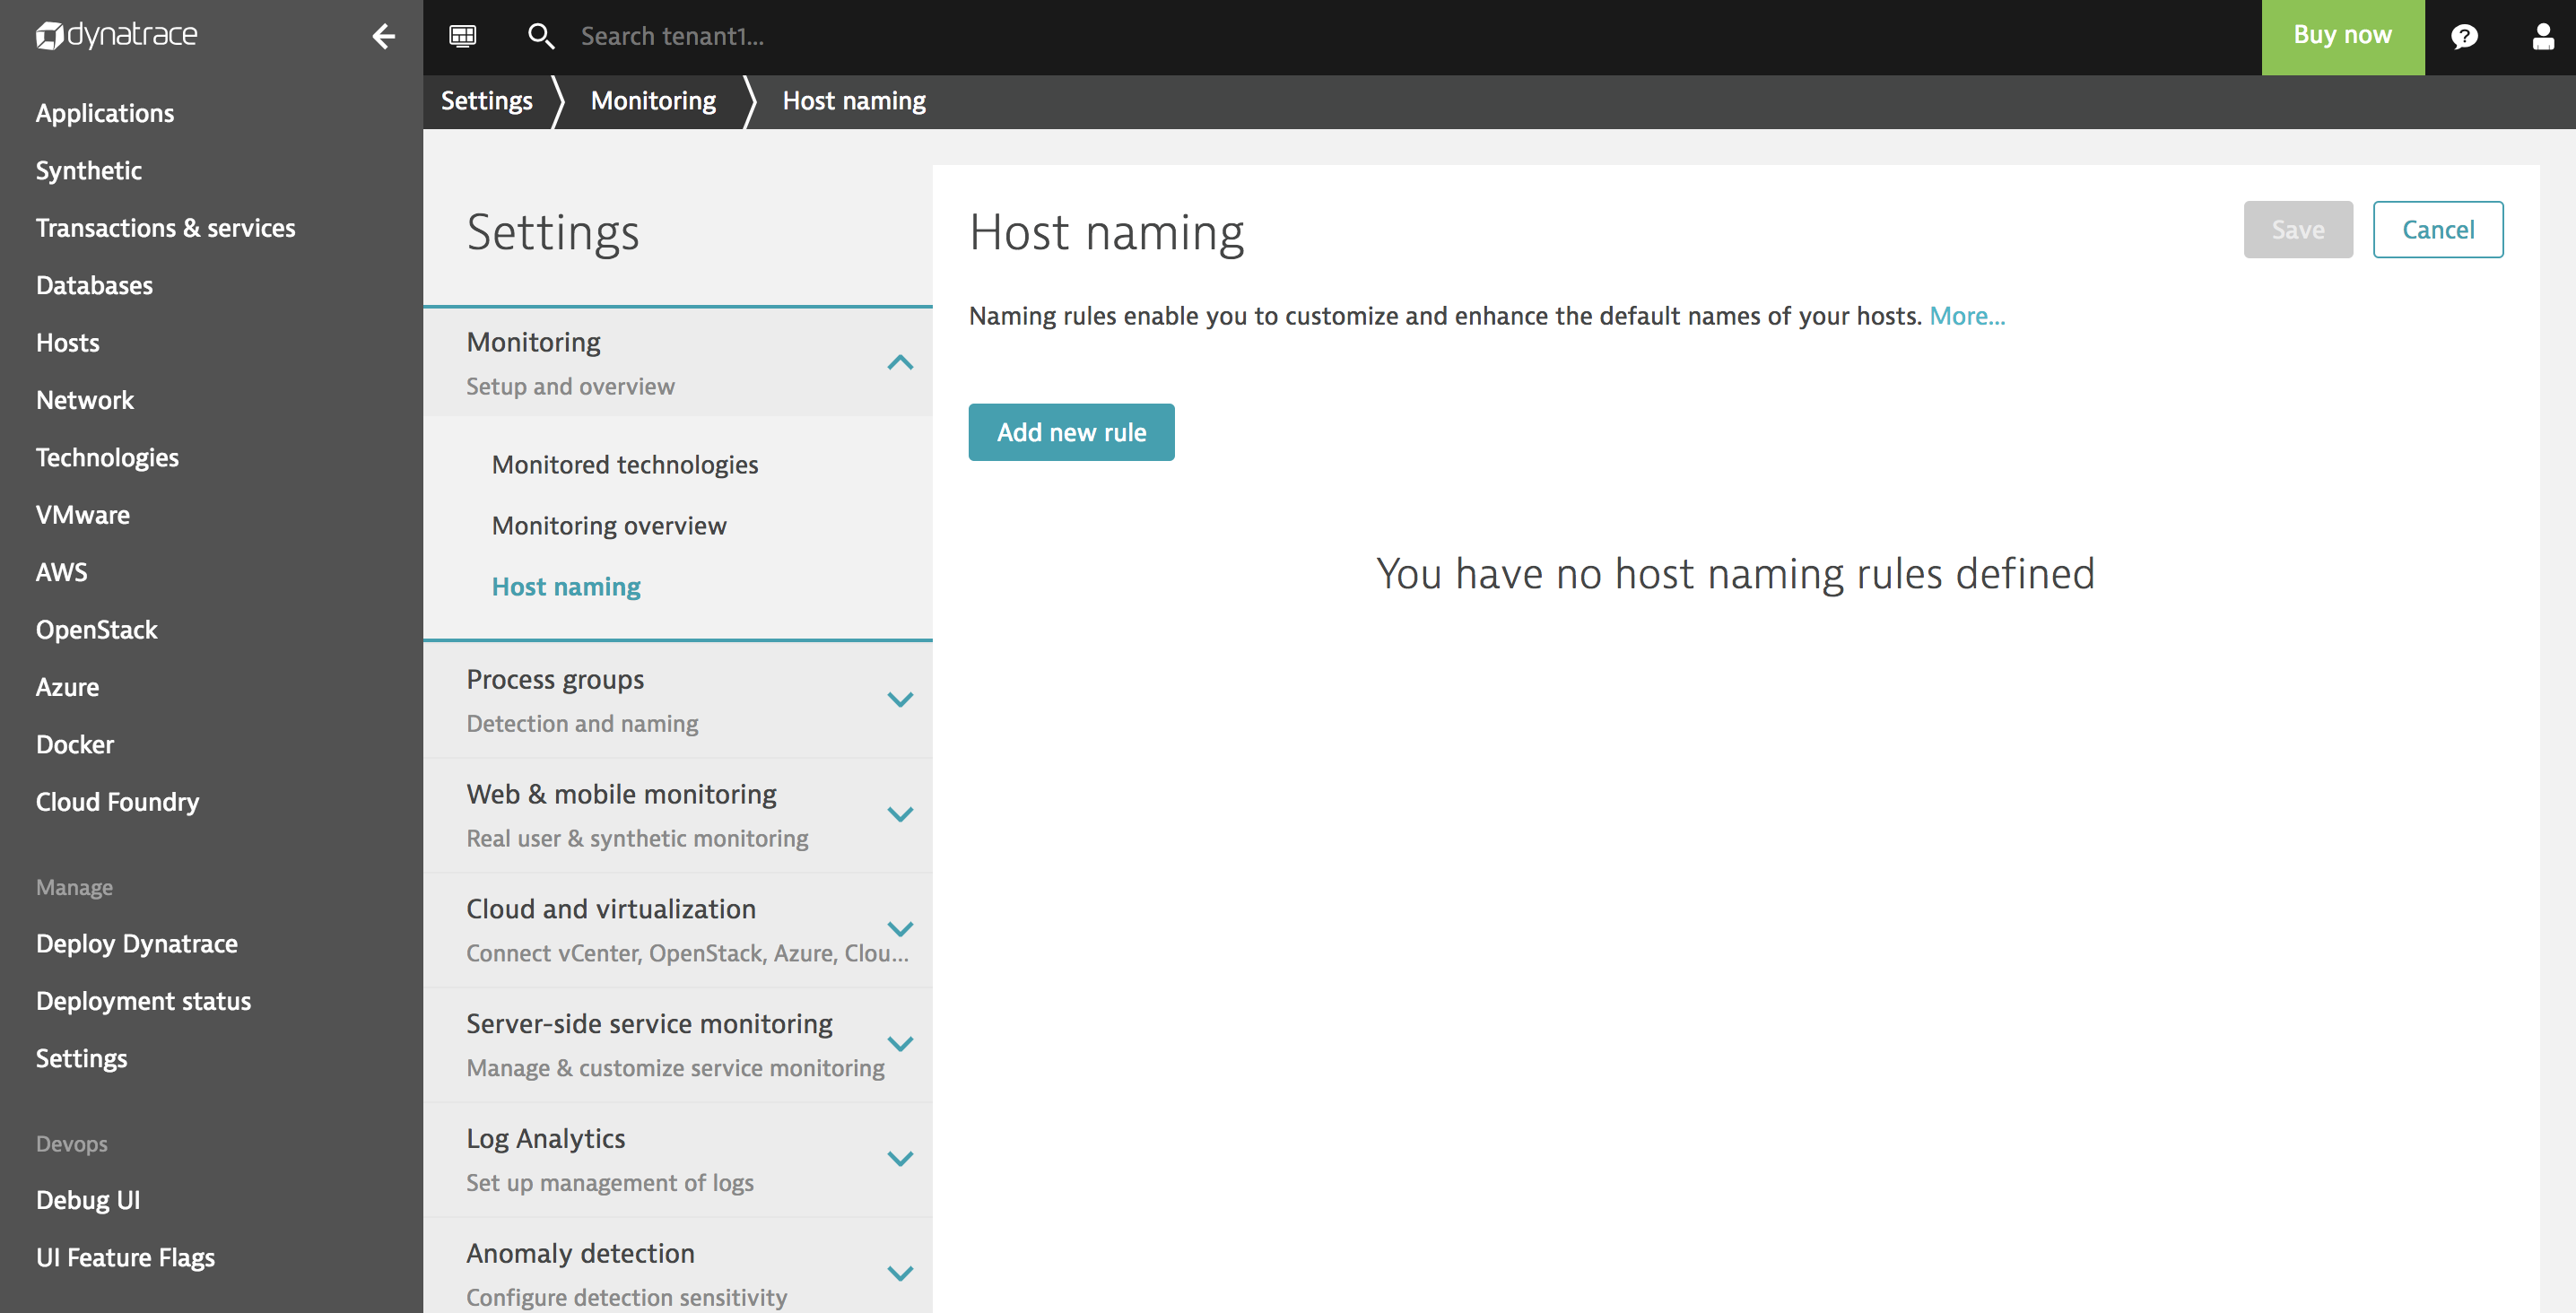
- Go to Settings > Monitoring > Host naming.
- Click the Add new rule button.

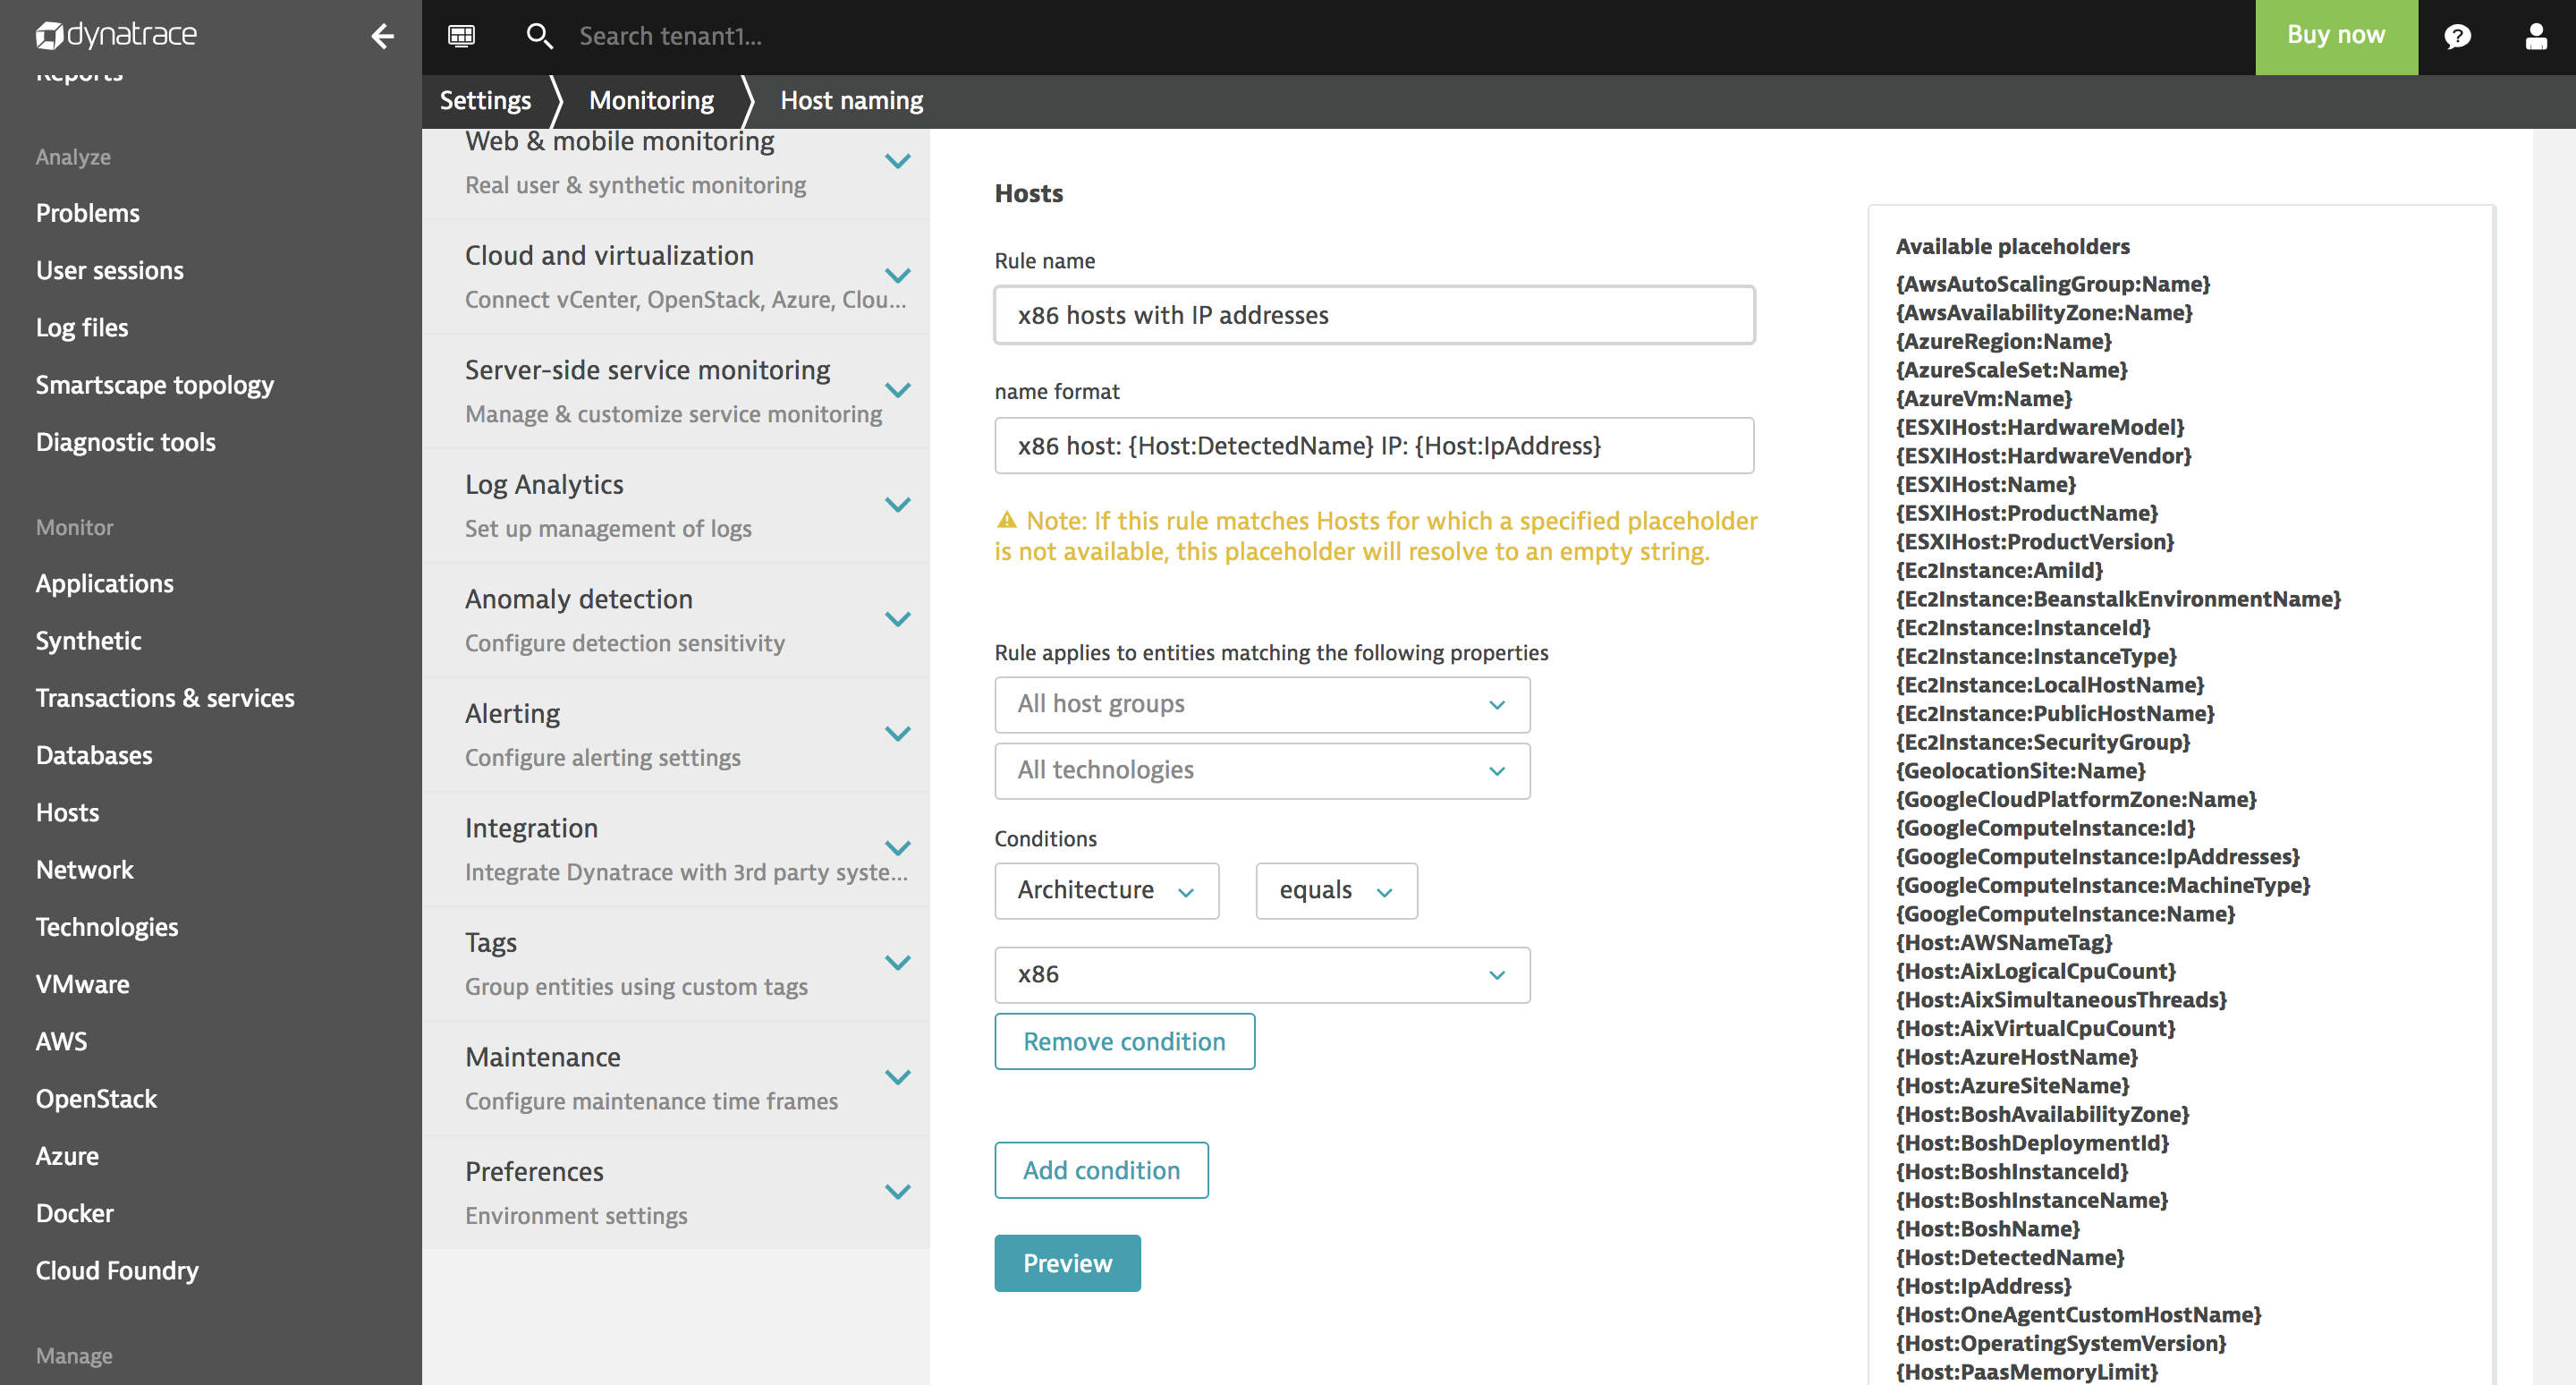
- Type in a Rule name.
- Define the host name format, including any static text string that describes the named process group. Optional placeholders are available to make it easy to dynamically include specific host properties in your automated host naming scheme. These placeholders make it possible to select from a variety of values, including the system-level detected hostname. You can also choose from a number of cloud environment variables and host properties that are collected by Dynatrace.
- Select additional filtering properties, if required.
- Add one or more conditions to the rule so that the rule applies your new naming scheme to only those hosts that you want to rename. Optional conditions can check for the existence of many different types of host attributes ranging from architecture, OS type, bitness, to cloud-specific details and tags.
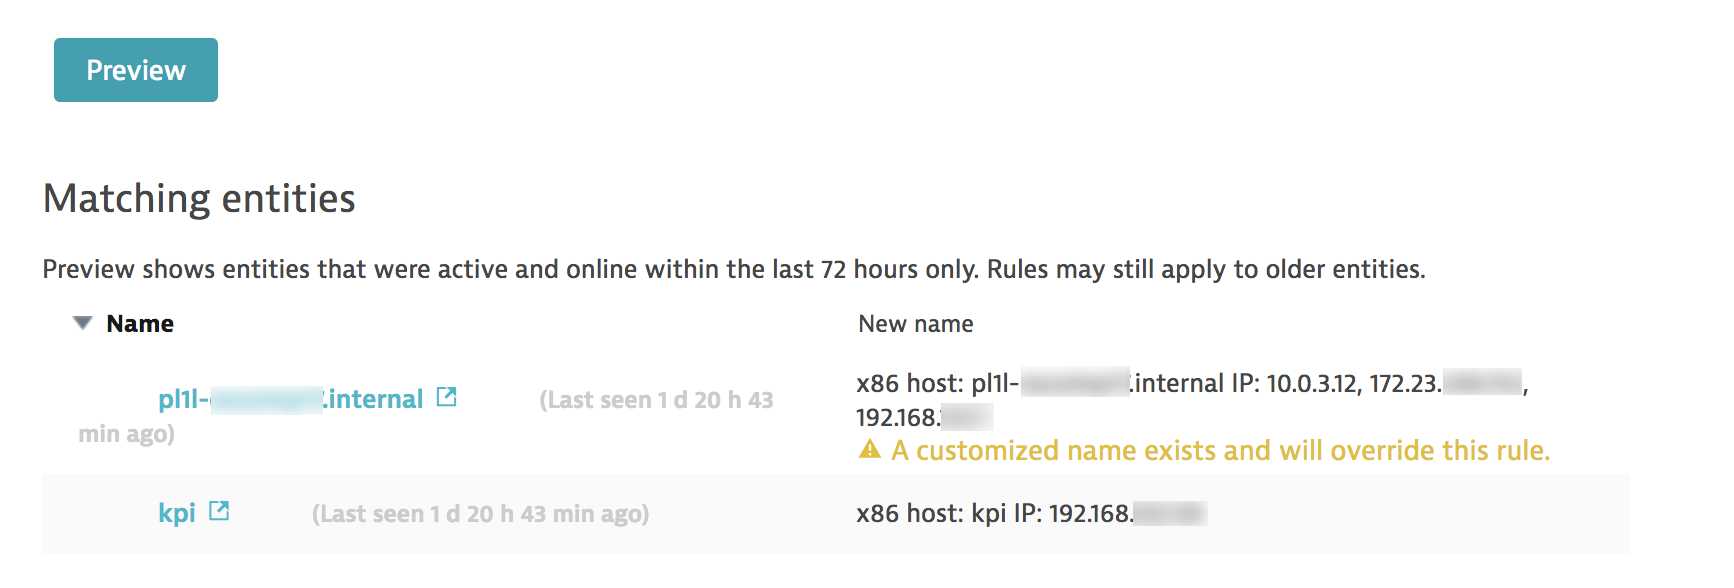
Thex86condition included in the example below means that the defined host naming rule (which specifies that hostnames should be based on the detected hostname and IP address) will only be applied to x86-based systems.

Host naming rules don’t require that you restart your hosts or processes. And they don’t affect how hosts are identified and grouped. These rules simply provide a fast and easy means of applying intuitive naming conventions to your hosts.


Looking for answers?
Start a new discussion or ask for help in our Q&A forum.
Go to forum